How to submit an expense claim using Expense Lines and Sheets #
Expenses in Timewize are structured as Expense Lines within Expense Sheets. This enables related transactions and expenses to be grouped together for efficient processing and, where applicable, billing to the client.
- Expense Lines are the individual transactions or purchases (e.g. lunch, taxi fare) for which you have incurred an expense
- Expense Sheets are the collection or of Expense Items to be bundled in a single claims process (e.g. “Client workshop in Sydney”)
Creating an Expense Line #
Navigate to the Expense Line submission page using the lefthand navigation bar.
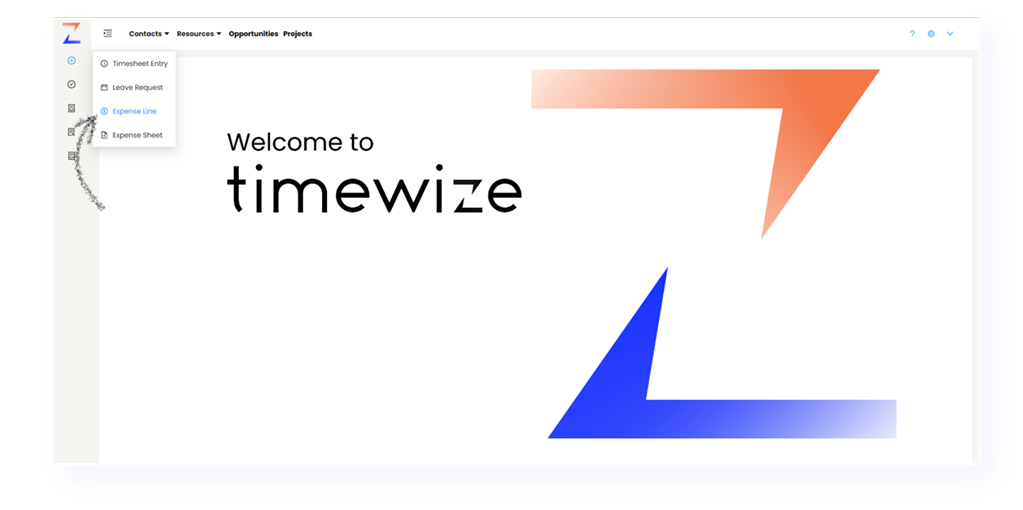
- Create an Expense Line by clicking the Add Expense button.
- Input expense type, project, date, amount, and whether the expense is directly reimbursable to you.
- Select a project if the expense was accrued in relation to a project. From the dropdown, will only be able to select projects to which you are assigned as a Resource.
- Attach expense invoices/receipts to each Expense Line as applicable.
- Input expense type, project, date, amount, and whether the expense is directly reimbursable to you.
- Repeat the steps to create an Expense Line for each individual expense item.
Creating an Expense Sheet #
- Once you have created all Expense Lines, navigate to the Expense Sheet tab to create an Expense Sheet. All Expense Lines will appear in the table.
- Click Add Expense Sheet and select all relevant Expense Lines created in the first step.
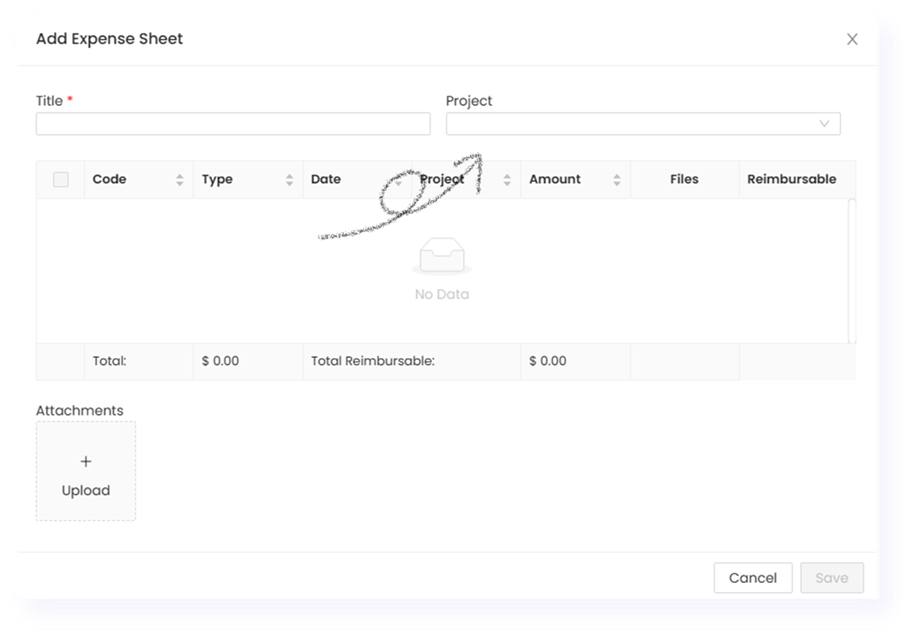
Tip: By default, you will be able to see all Expense Lines created. You can filter all Expense Lines attributed to a particular project using the Project drop-down in the pop up. You will only be able to see projects to which you are assigned as a Resource.
- Use the Attachments to upload approval documents from the client as applicable.
- Once complete, click Save.
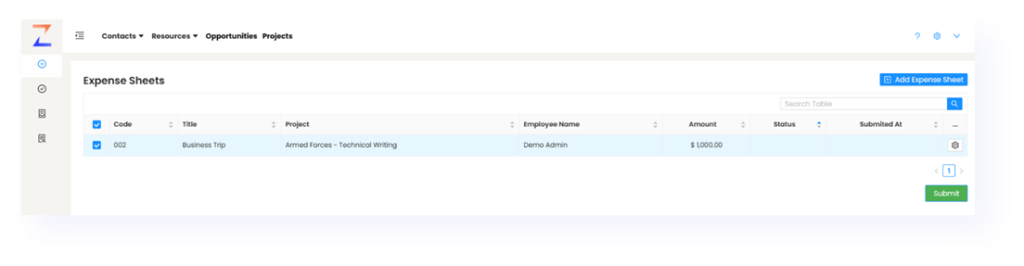
Tick the relevant Expense Sheets you wish to submit. Click the Submit button to send the Expense Sheet for approval.